
This post may contain affiliate links. A small commission may be earned if you make a purchase through my links. Thank you for supporting my blog!
The activities I do with my toddler are usually simple, hands-off ways to keep her entertained — but sometimes, you just need a little keepsake to remember how tiny those hands once were.
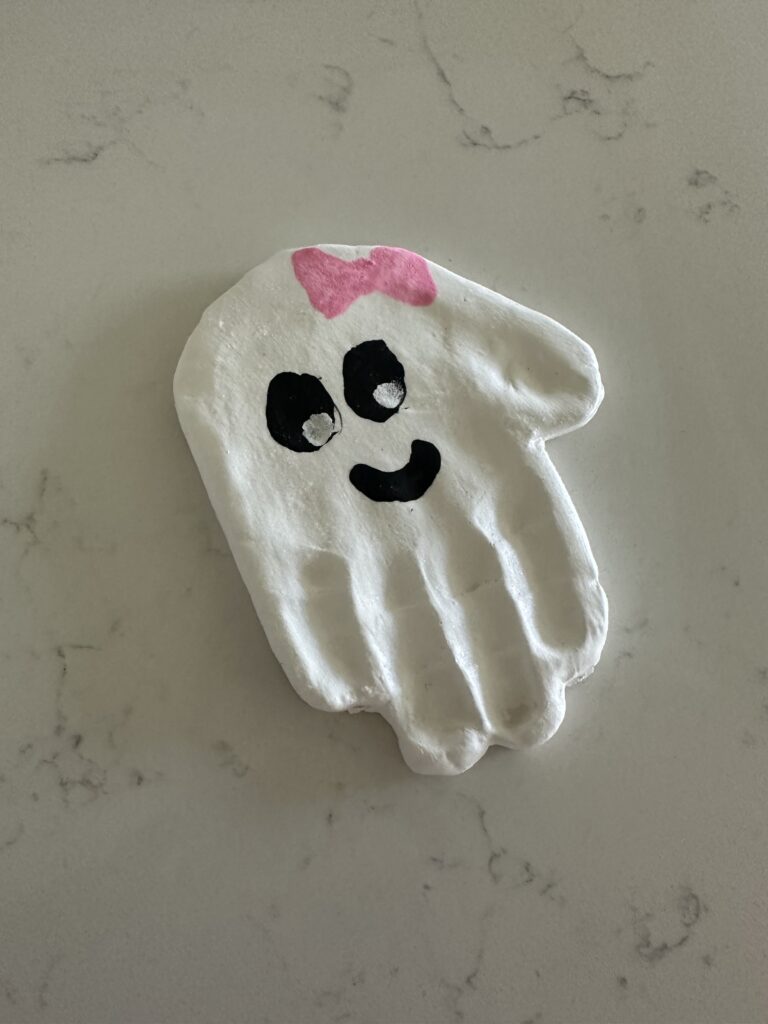
This sweet Halloween ghost handprint keepsake is easy to make and so fun for toddlers to help with. It also makes a meaningful gift for grandparents or a special decoration to pull out every October.
Why This Keepsake Matters
When I was a first-time mom, I didn’t always have the headspace or energy to do keepsakes and honestly, I really regret that. I wish I had more physical memories from those early days. So now, I try to make them whenever I can.
If you’re in a similar season where keepsakes feel overwhelming, I see you. Here’s a little trick that’s helped me with kids 2 and 3: stamp your child’s hand or foot on cardstock, then save it for later when you’re ready to do the full project.

For my baby’s first year, I even used the hospital footprint they sent me home with. It’s such a sweet way to preserve that tiny stage, without the pressure to create a Pinterest-worthy craft in the moment.
This hack is a little easier for something like my Mother’s Day Floral Handprints, Christmas Mistletoes, or Valentine’s Day Heart Footprints – but, it would have really helped when I was in the thick of motherhood with my first.
Now that I have three kids, I’ve also started creating keepsakes when I watch friends’ babies. It’s one of my favorite presents to give a fellow mom.
How to Make a Halloween Ghost Handprint Keepsake
These clay ghosts are fun for kids to help paint, and they can be turned into:
- Jewelry dishes
- Hanging ornaments (just add ribbon!)
- Thoughtful grandparent gifts
Supplies You’ll Need (Full Amazon List):
- Air Dry Clay
- White, black, and pink acrylic paint (we love this matte kind!)
- Paintbrushes
- Rolling pin
- Wax or parchment paper (optional, but helps with clean-up)
- Glitter (optional, but very fun)
- Butter knife or plastic knife for trimming
- Water for smoothing edges
Step-by-Step Instructions
1. Roll the clay
Roll out the air dry clay to about 1/3 inch thick, just big enough for your toddler’s hand (or foot!). Lay parchment paper down if you want to avoid sticking.
2. Press the handprint
Help your toddler press their hand firmly into the clay. You can use open or closed fingers — both look adorable as ghosts!
3. Trim and smooth
Use a butter knife to trim the clay around the handprint. Wet your finger and gently smooth the edges.
4. Let it dry
Set the handprint aside to dry for 2-3 days, depending on the thickness and humidity.
5. Paint your ghost
Once fully dry, let your toddler paint their ghost white. Optional: while the paint is wet, sprinkle on some glitter for spooky sparkle!
6. Add details
Paint on little black eyes, a smile, and add pink cheeks or a bow for extra cuteness.
7. Personalize it
Don’t forget to write your child’s name and the year on the back!
Bonus Tip
If you want to turn this into a hanging keepsake, poke a hole at the top of the clay before it dries, then thread ribbon through once complete.
Looking for More Halloween Fun?
Check out the full list of 13 Easy Halloween Activities for Toddlers filled with crafts, snacks, and hands-on fun that’s simple to set up.
Or grab the free Toddler Activity eBook for 52 engaging activities you can do with your little one, anytime you need a win.
As always, you’re doing an amazing job, mama.
xx Ciara


Pingback: 13 Activities of Halloween Toddler Edition - Ciara Deanne on September 21, 2024
1 COMMENT