This post may contain affiliate links. A small commission may be earned if you make a purchase through my links. Thank you for supporting my blog!
If I’m being honest, I never did sensory bins when my oldest was little. The whole process felt way too overwhelming, all the stuff, the mess, the setup. But I was so wrong! Once I actually tried sensory play, I realized it entertained my toddler for so long and gave us some of the best, most creative play. The problem was, I didn’t have a good system.
Now that I do, sensory bins have become one of our favorite activities. And I promise, once you have a simple setup and a few go-to supplies, it doesn’t feel overwhelming at all. Let me walk you through exactly how I build sensory bins, how I store everything, and my secret to keeping them fresh without constantly creating something brand new.
Why Sensory Bins Are Worth It
Sensory bins are one of the easiest ways to give toddlers and preschoolers open-ended play. They’re simple, engaging, and can grow with your child’s age and stage.
A few things I love about them:
- They allow kids to dig, pour, scoop, and dump… all things toddlers love.
- They encourage imagination while sneaking in learning opportunities.
- They’re perfect for days when it’s too hot or cold to play outside.
- They entertain my kids (ages 2 and 4) for an hour or more, which means I get a little breathing room (a win-win).
My Sensory Bin Setup
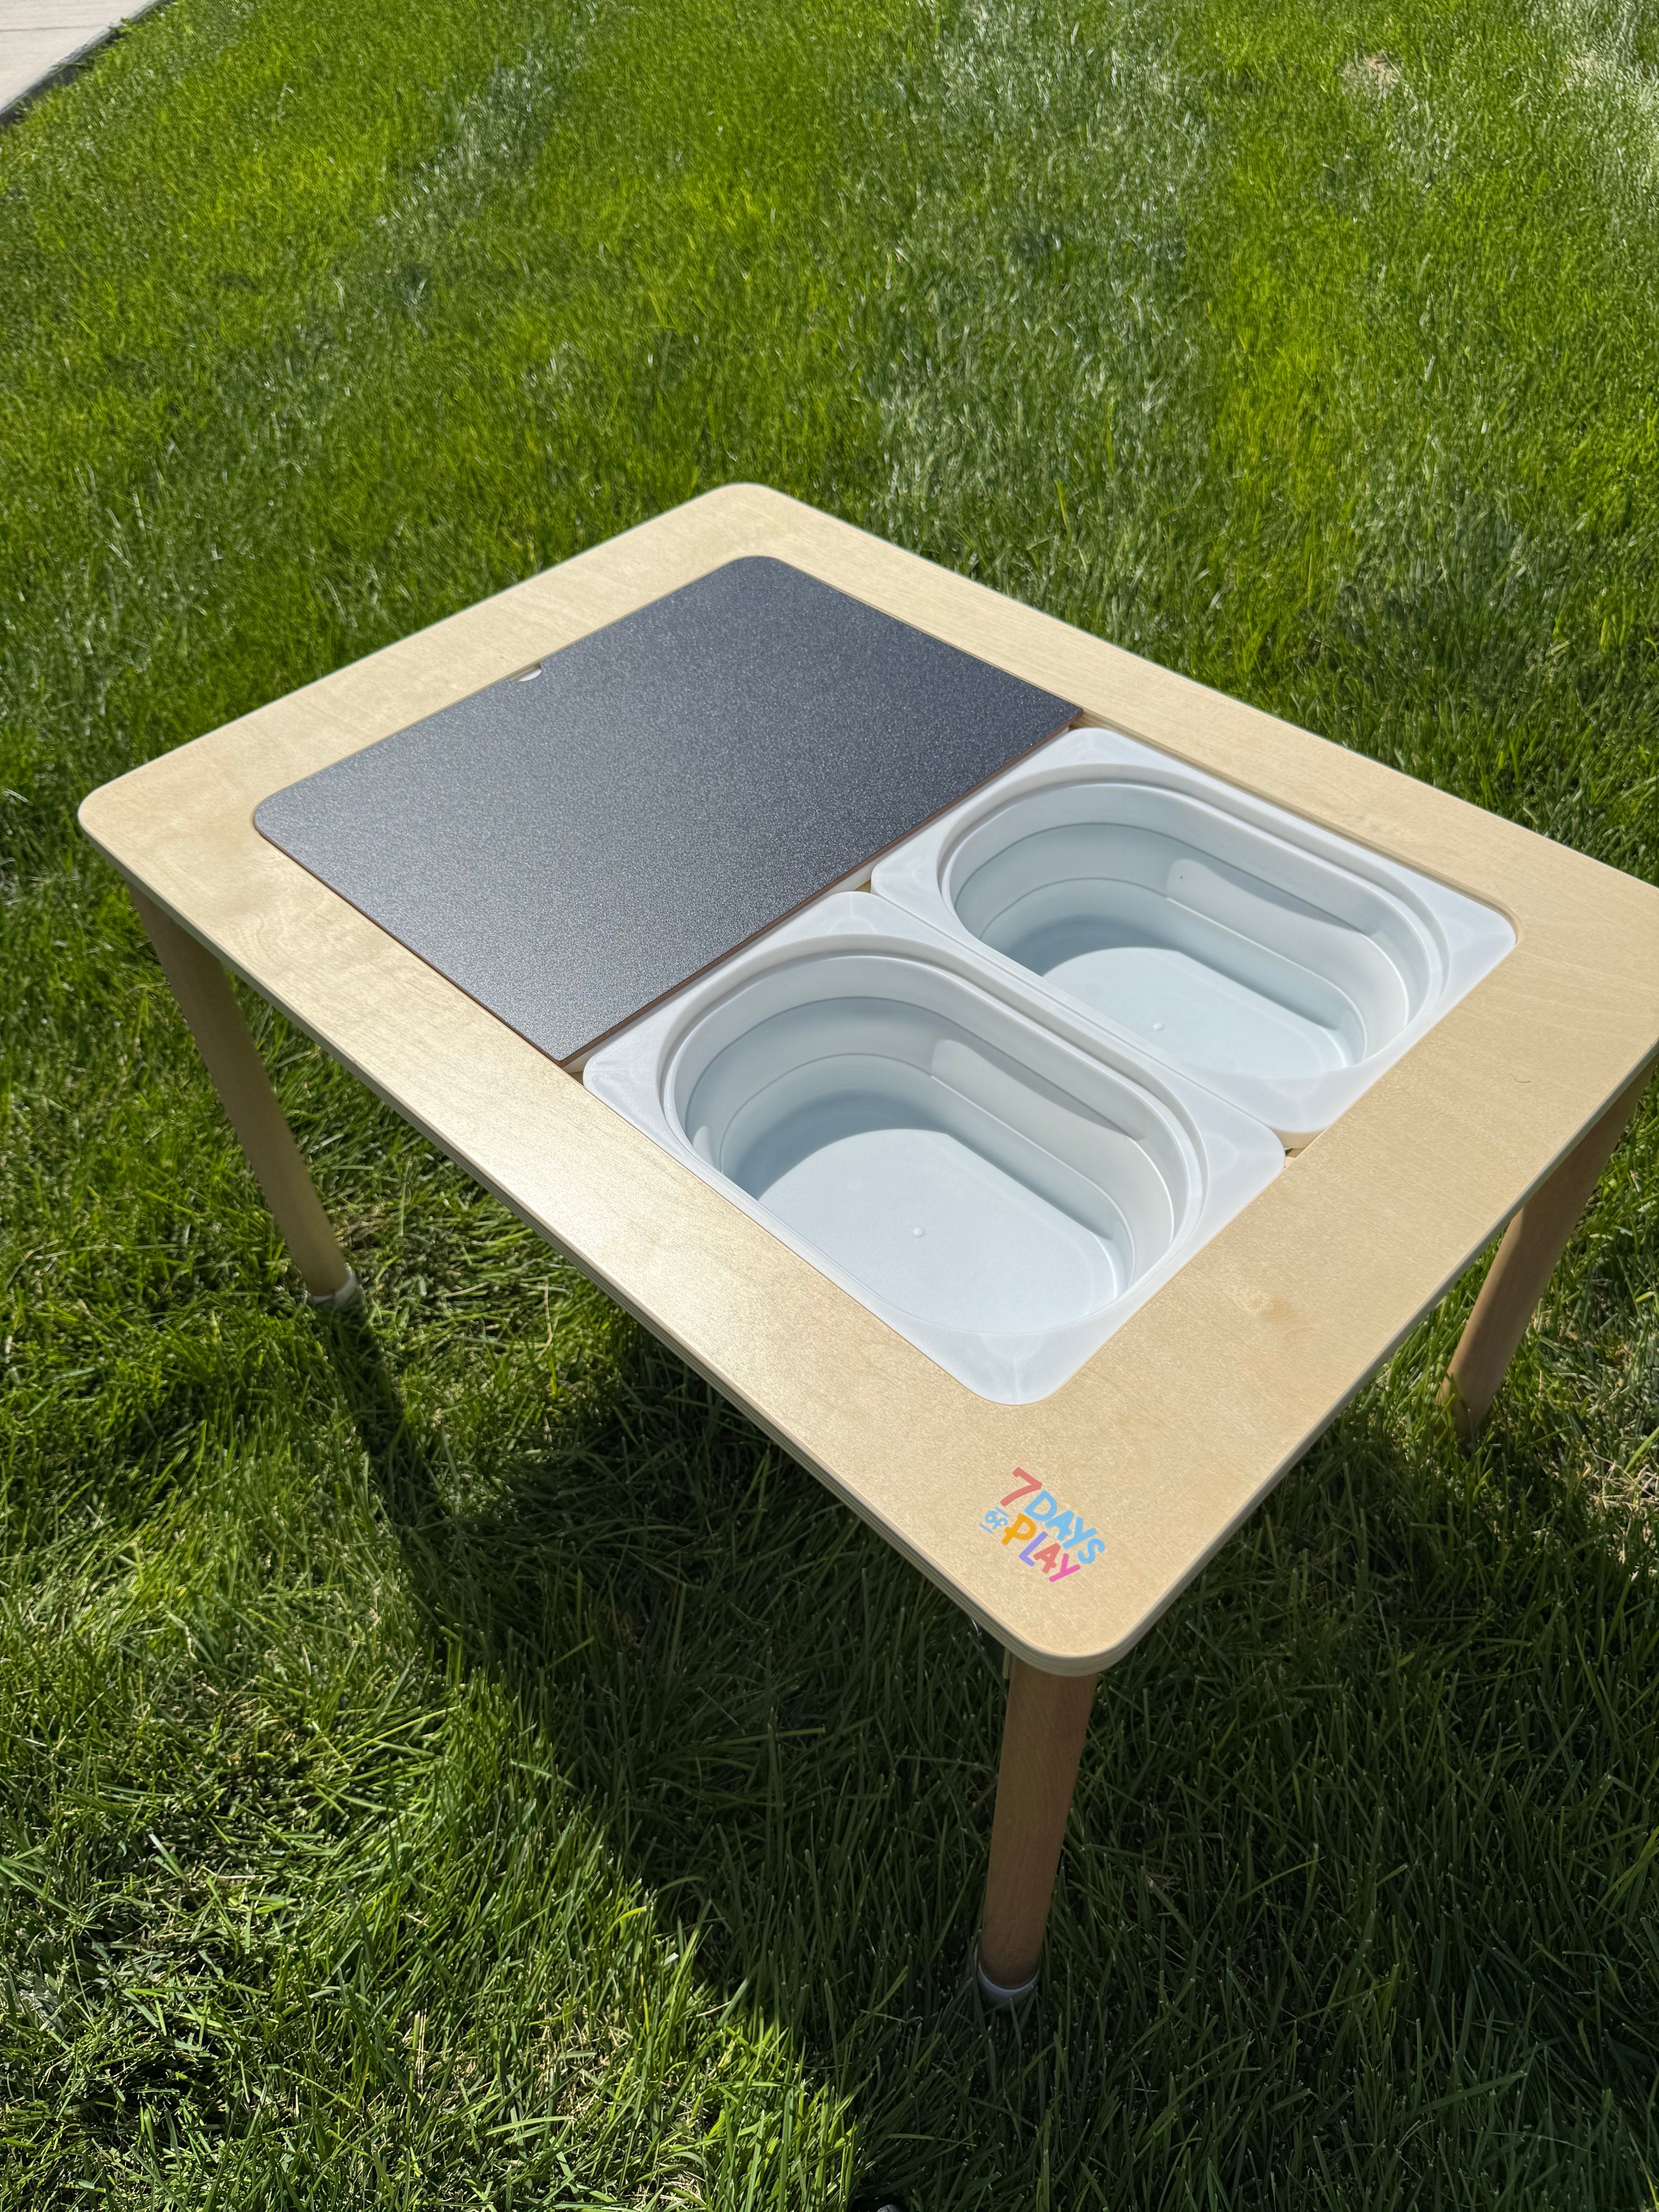
1. A Sensory Table
I honestly think having a sensory table is a game changer. We have the 7 Days of Play Sensory Table and I love it. The bins sink into the table instead of sitting on top, which cuts down on mess (and the mess was always what deterred me before) and it fold up for easy storage. I wrote a full review of it here. Any sensory table will work, or a just using sensory bins if you don’t have the dedicated table!
2. Storing Bases
The key to making sensory play easier is having bases ready to go. I store ours in big puzzle bags with zippers. That way, I can grab a bag of rice, beans, or pom poms and switch out the bin in seconds.
3. Storing Toys and Accessories
For smaller toys, letters, or numbers, I love using clear zippered pencil cases. They make it super easy to see which theme you’re grabbing, and they’re cheap to stock up on. If they are out of stock, the puzzle bags can work here too!
How to Build a Sensory Bin
Here’s the formula I use every single time:
Step 1: Choose a Base
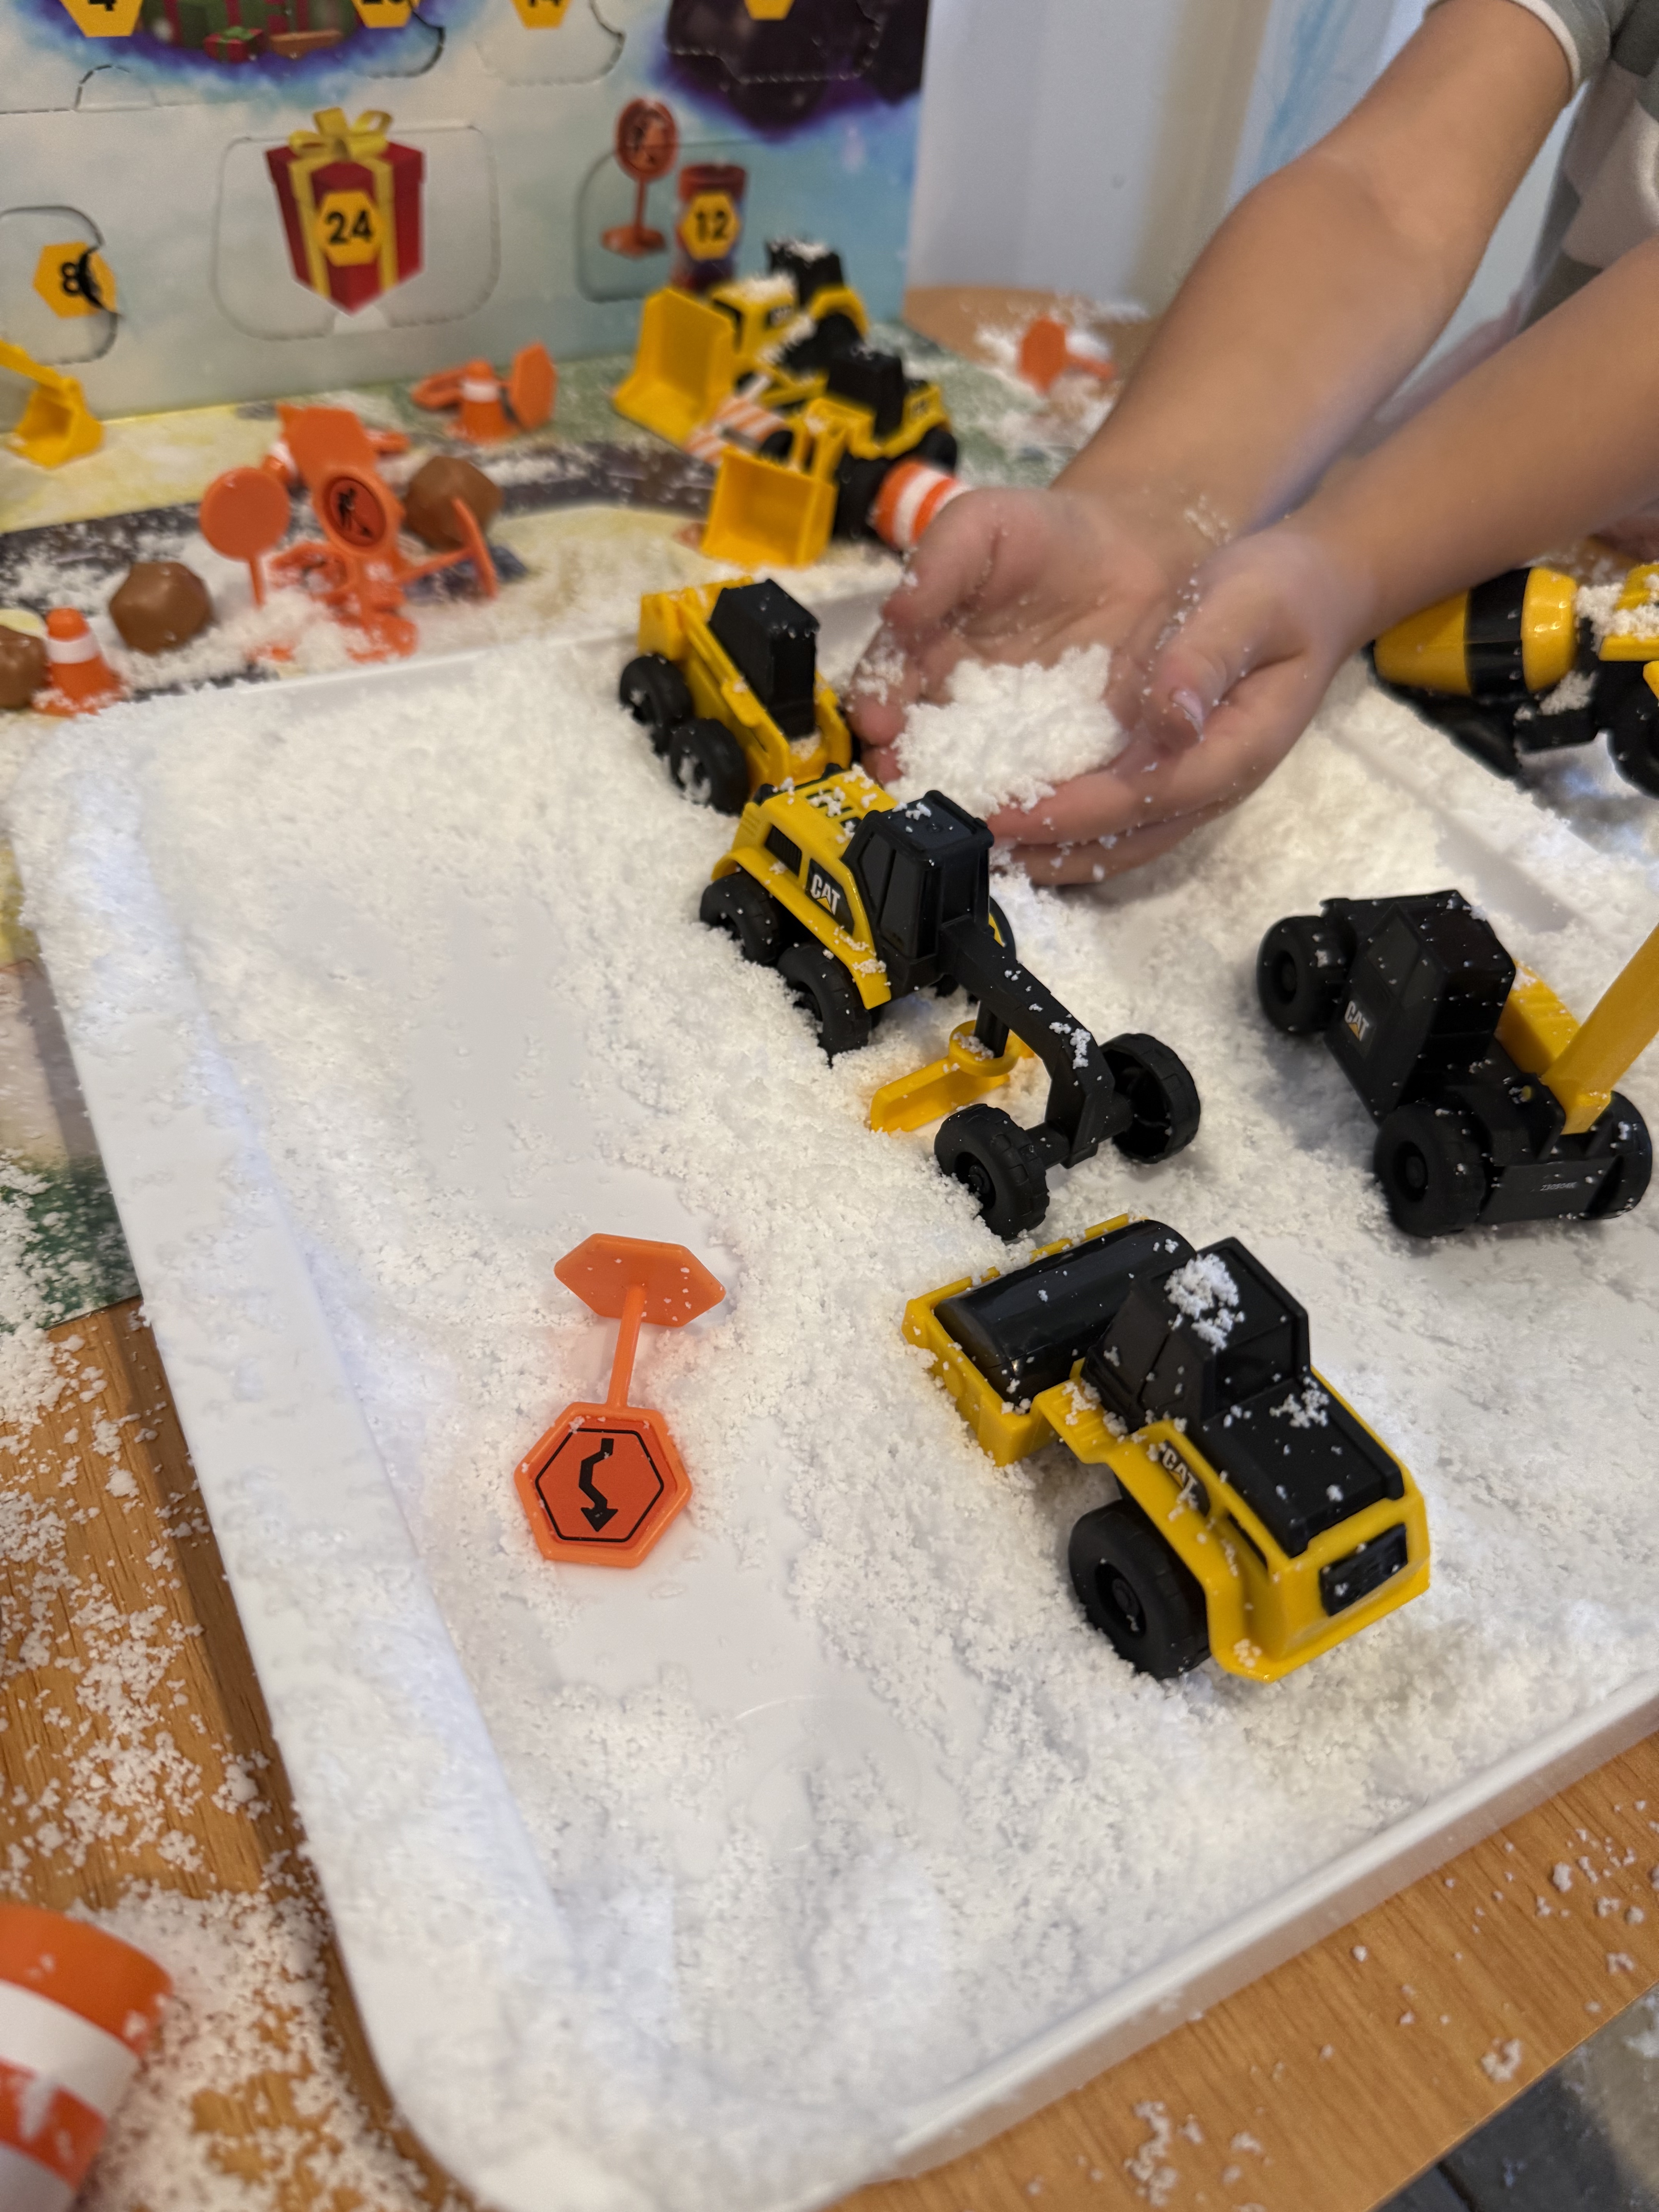
Rice, pasta, beans, kinetic sand, water, pom poms, shredded paper, salt, fake snow, chickpeas — the options are endless. I also will have tutorials for making colored rice, colored chickpeas, and colored salt coming to the blog soon!
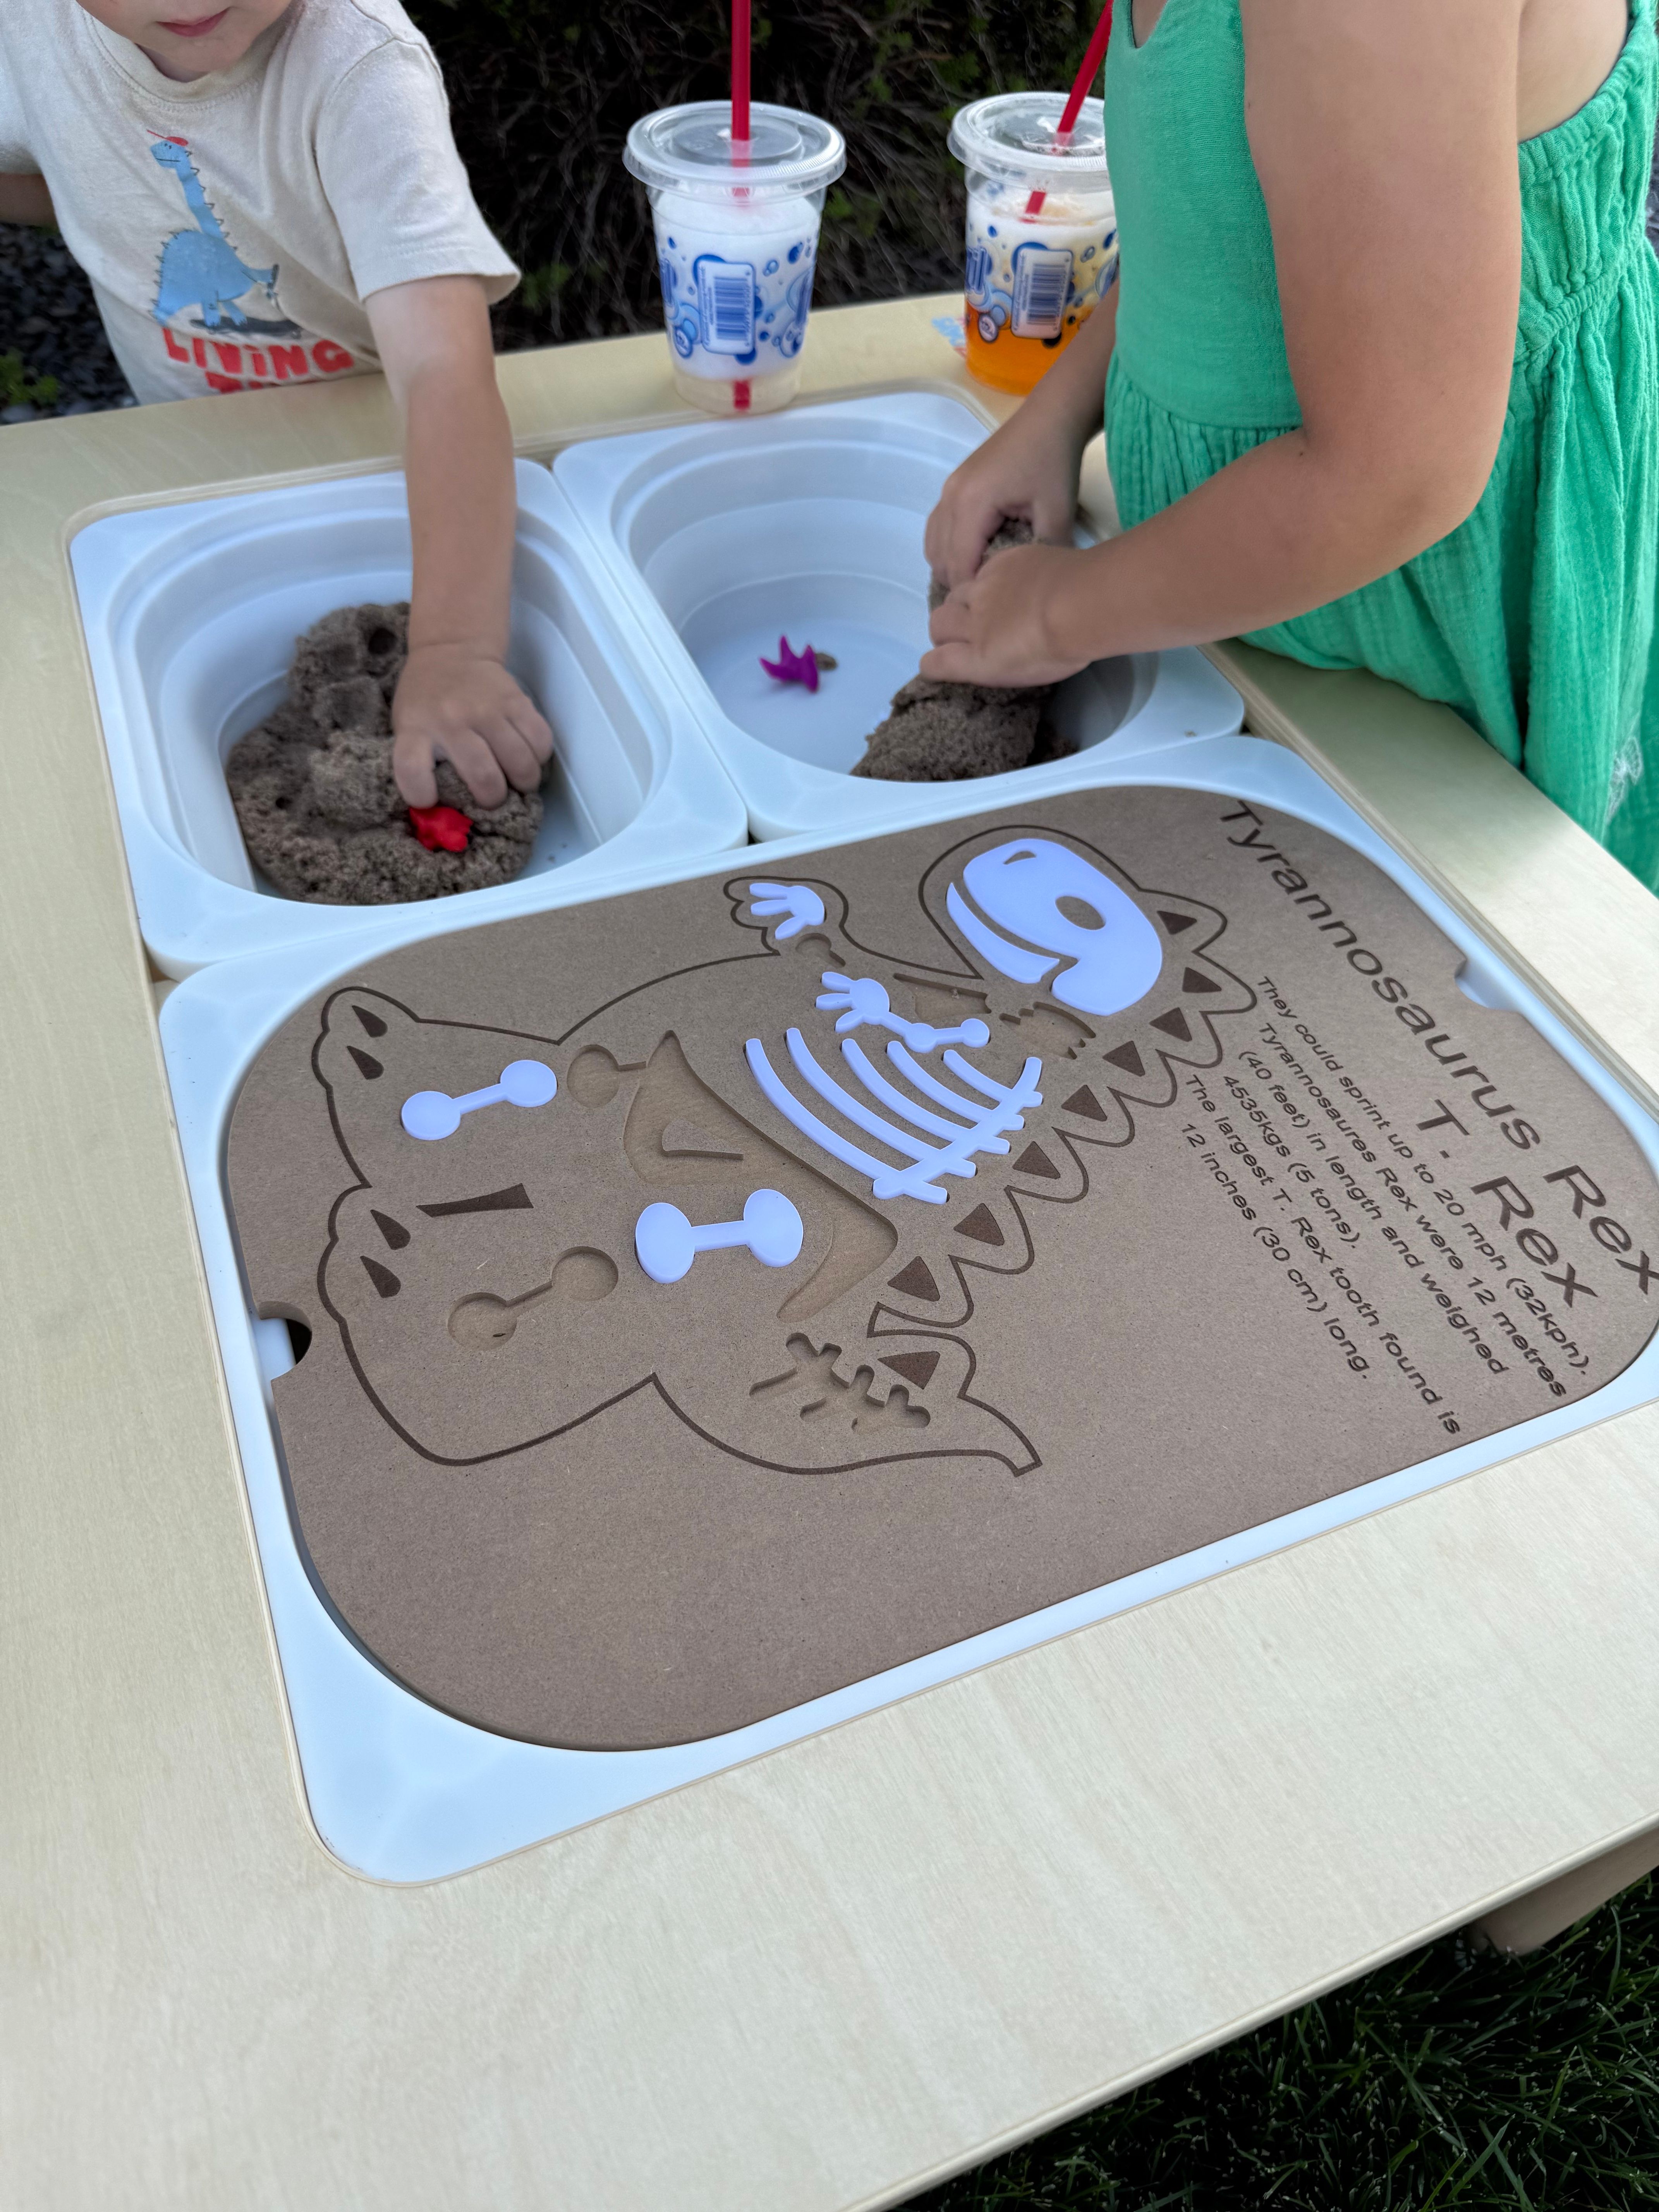
Step 2: Add a Theme
Go with your kids’ interests (dinosaurs, animals, trucks) or tie it to a season or holiday.
Pro Tip: Don’t over think this part. Throw in your toddler’s favorite little people or 2-3 trucks. We are not working on Pinterest perfect over here, just trying to get that play time (and break for us!).
Step 3: Layer in Learning
Shapes, colors, letters, and numbers work great. But even just scooping and pouring builds life skills toddlers need.
Step 4: Tools & Accessories
Spoons, tweezers, cups, silicone muffin holders, funnels, pipettes. Don’t feel like you need them all at once.
Pro Tip: Build your collection slowly from the Target Bullseye area, seasonal clearance (pool toys make great sensory bin toys), or Amazon.
The Big Secret: Rotate for Freshness
Here’s the truth… you don’t need a brand-new sensory bin every day. In fact, my kids will happily play with the same bin all week if I change it up just a little.
Here are 3 easy rotation tricks I use:
1. Seasonal Swap
- Spring – Plastic eggs, flowers, bugs, pastel rice/pasta
- Summer – Seashells, water play, beach toys, blue rice
- Fall – Leaves, pinecones, acorns, orange/yellow rice
- Winter – Cotton ball “snow,” arctic animals, snowflake confetti
Example: Take a farm animal bin and swap dirt/sand for fall corn kernels or winter cotton snow.
2. Learning Layer
- Toddlers → shape matching or color sorting
- Preschoolers → letter hunts, number matching, or spelling simple words
Example: A rainbow rice bin becomes an alphabet hunt by tossing in foam letters.
3. Tool Change-Up
- Toddlers → cups, scoops, spoons for pouring and dumping
- Preschoolers → tongs, tweezers, droppers for fine motor skills
Example: A pom pom bin with measuring cups one week → tongs and muffin tins the next.
Age Tips
Sensory bins are flexible, which makes them perfect for siblings at different stages. I usually set up two bins side by side for my 2-year-old and 4-year-old. I keep the base the same but change the learning layer and tools.
- For my 2-year-old: colors and shapes
- For my 4-year-old: letters, numbers, and counting
I always choose bases I feel safe letting both kids explore on their own. To me, the whole point of sensory bins is independent play so I can sip my coffee or squeeze in a little work while they’re busy.
Where to Get Sensory Bin Supplies
You don’t need to buy everything at once. Start small and build your collection over time. Here are my favorite spots to grab items:
- Your own toy box – little animals, cars, and play food all work!
- Target Bullseye or Walmart dollar section – great for seasonal finds.
- Clearance toys – bath toys, pool toys, and end-of-season sales are gold.
Our Favorite Tools
- Learning Resources Fine Motor Set– scoops, tweezers, and tongs
- Tongs and Scoops Set – fun for both toddlers and preschoolers
These tools don’t just make sensory bins more fun, they strengthen fine motor skills, which helps with writing, cutting, and so much more down the road.
More Toddler Play Ideas
If you’re looking for even more ways to keep your kids busy, check out:
You’re doing a great job, mama. Don’t overthink it. Your kids will love whatever you put together. And I’ll be sharing more sensory play setups soon, so be sure to follow along!
xx,
Ciara


Pingback: The Best Foldable Sensory Table for Toddlers: Our Honest Review - Ciara Deanne on August 26, 2025
1 COMMENT