Looking for an easy Christmas keepsake idea you can make at home? These DIY resin photo ornaments are the perfect personalized gift for grandparents, newlyweds, or your own tree.
This post may contain affiliate links. A small commission may be earned if you make a purchase through my links. Thank you for supporting my blog!
I love creating keepsakes during the holidays, it’s one of my favorite traditions as a mom. Every year, I try to make something special that captures a little piece of our family right where we are. This year, I found the coolest idea for DIY photo ornaments using resin, and they turned out absolutely beautiful.
We had family photos taken recently, and I wanted a fun way to show them off. These photo ornaments were the perfect way to do that and create meaningful Christmas gifts for the grandparents!
A Little Background: Why Keepsakes Mean So Much to Me
I haven’t always been the mom who makes all the keepsakes and crafts. After my first baby, I went through a really difficult postpartum season. I struggled with postpartum depression and anxiety, and honestly, I didn’t have the energy or motivation to do much of anything, especially holiday projects.
If you’ve ever felt the same way, I see you. It’s okay if some years look different. You’re still creating memories with your little ones just by showing up and taking care of yourself.
Thankfully, my next two postpartum experiences were gentler, and now that I have more energy, I love leaning into all the special crafts and keepsakes with my kids. Even so, I know how hard it can be to find time (and all the supplies!) when little ones are running around.
One of my favorite hacks is to get a few handprints or footprints from each kid on cardstock early in the season. That way, I can use them later for multiple crafts like our Mother’s Day Floral Footprints, Christmas “Mistletoes”, or Valentine’s Day Footprint Hearts. Those little prints are still some of my favorite decorations around the house.
This Year’s Keepsake: Easy DIY Resin Photo Ornaments

This year’s project is a little different, you don’t even need handprints or paint! These DIY resin photo ornaments are a simple way to turn favorite family photos into timeless keepsakes.
They also make such thoughtful gifts for grandparents, newlyweds, or new parents celebrating baby’s first Christmas. And if you have older toddlers or preschoolers, they can absolutely help! My 4-year-old helped me pour the resin and pick out which photos to use (with lots of supervision, of course).
We even made a few extra “my favorite things” ornaments for her, such a cute idea for kids to personalize their own (it’s like a little time capsule of her at that age).
What You’ll Need:
- Silicone Ornament Mold (Coasters option here)
- Non-Toxic Epoxy Resin (the one I use is s a 1:1 mix and very beginner-friendly)
- Plastic Cups (for mixing and pouring)
- Wooden Popsicle Stick (for stirring)
- Printed Photos (4×6 works great, we love Shutterfly)
- Small Hole Punch
- Scissors
- Can or circular object (for tracing)
- Kitchen Scale (optional, but helpful for accuracy)
- Vinyl + Cricut Joy Xtra (optional for names or dates)
- Mica Glitter (optional for a sparkly backing)
- Ribbon for hanging
How to Make Resin Photo Ornaments
1. Cut Your Photos
Choose your favorite photos and use a can or round object to trace circles slightly smaller than your silicone mold. Cut them out and punch a small hole where the ribbon will go.
2. Optional: Add Vinyl Details
If you want to personalize your ornaments, use a Cricut Joy Xtra to add a name, year, or small design to your photo.
3. Mix Your Resin
Mix the resin and hardener in a 1:1 ratio (use your scale if needed). Work quickly, epoxy usually has about a 30–40 minute work time. I mix enough to fill my four-piece mold, which usually comes out to about XX ounces total.
4. Optional: Add Glitter Layer
If you want a glittery background, divide your resin mixture into two cups. Add about ¼ teaspoon of mica glitter to one cup and stir. Pour this layer first and let it level out.
5. Add Your Photo
Gently place your photo on top of the glitter layer, then pour the clear resin over the photo until it’s fully covered. Avoid over-pouring, make sure the ribbon hole stays open!
6. Let It Cure
Leave your molds in a clean, dust-free area on a level surface for 24 hours to cure completely.
7. Demold + Add Ribbon
Once cured, carefully pop your ornaments out of the molds, string your ribbon through, and they’re ready to hang or gift!
Finished Result + Gift Ideas
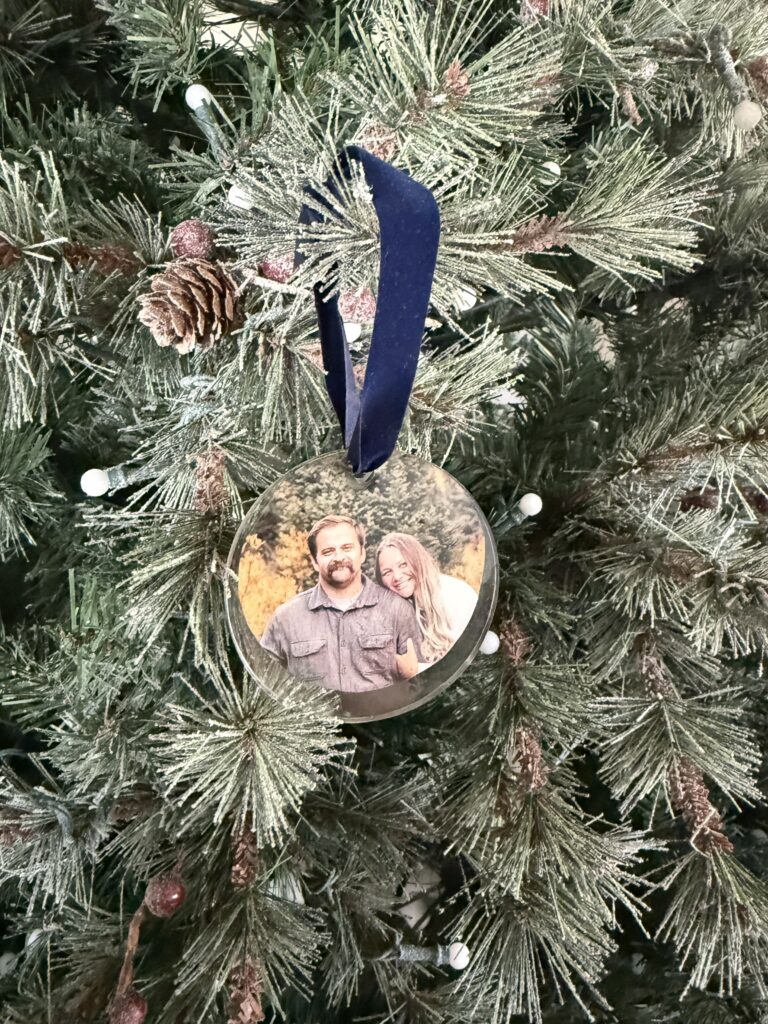
These ornaments turned out so beautiful. My daughter loved helping and was so proud to see her handiwork on the tree. I printed a few extra photos knowing she’d want to make her own, and it was the sweetest little project to do together.
There are so many ways to customize these resin ornaments:
- Baby’s First Christmas
- Newlywed or Engagement Photos
- First Home Ornament
- Family Pet Keepsake
- Child’s Artwork or “My Favorite Things” Ornament
You can even use the same method with coaster molds to make matching photo coasters, a perfect DIY gift set for grandparents!
Tag Me If You Try It!
If you’re looking for an easy, low-stress DIY Christmas keepsake, this is such a fun one to try. It’s beginner-friendly, beautiful, and makes such a heartfelt gift. I love that it combines creativity with meaning, something you’ll treasure for years to come (and that grandparents will adore opening on Christmas morning).
If you try these resin ornaments, tag me on Instagram (@ciaradeanne) I’d love to see how yours turn out! Creating keepsakes like this has become such a special part of our family traditions, and I hope it inspires you to start one too.
Before you go, don’t forget to check out a few of my other favorite DIY keepsakes and gift ideas:
- Floral Handprints & Footprints
- Floral Mistletoes
- DIY Handprint Mugs
- Gift Guides for Everyone on Your List
Merry Christmas, Happy Holidays, and remember, you’re doing such a great job.
xx, Ciara